| This post has been moved to tiramipursuit's new website. Find it here. | Thank-you! | ||||||||||
Showing posts with label chocolate. Show all posts
Showing posts with label chocolate. Show all posts
Tuesday, July 2, 2013
Day 24: I love chocolate


Sunday, June 24, 2012

Thursday, May 3, 2012
Southern Decadence Cupcakes

Tonight is the reading for the social action essay class that I took this semester. We are all bringing food for the reception, so I opted to make cupcakes.
I should explain something first: My room is always messy and living in a tiny dorm room this semester didn't help matters. This is due in large part to the fact that I decided to start the baking club and have therefore been the keeper of every supply, gadget, ingredient and implement that we have used for our meetings. Every week, I would take bags and bags of these items back and forth between home, the kitchen, and my quickly filling room. Needless to say, although I will miss the meetings, I am glad that the semester is almost over and I will have a few months off!
That said, since the baking club was drawing to a close, I haven't been bothering to replenish my supplies of interesting ingredients, so I was left with a dwindling pile of basic necessities (which doesn't take up as much room, thank goodness). After agreeing to make the cupcakes, I thought "I need to use up the last few ingredients I have, what do I have left?"The most obvious hanger-on was a large bag of brown sugar.
Brown sugar never seems to get the love it deserves. It is often overlooked for the cloyingly sweet caramel, the flavorful, albeit bitter molasses or the standard, pale, granulated sugar. As for me, I love brown sugar and determined to send this bag of lonely sweetener out with a bang.
A while back, I experimented with a brown sugar frosting recipe and fell in love with it. But this icing recipe didn't include the grittiness of the brown sugar (and I think I may have undersalted it a little). I also really like See's butterscotch squares, so I thought that I would pair my latest attempt at brown sugar frosting with chocolate cake to emulate those delicious confections. The result was absolutely phenomenal if I do say so myself. For such a quick and easy recipe, the result was sophisticated and dangerously addictive. If you do get a chance to try this recipe, please let me know how it goes in the comment space below. Enjoy!


 |
| yum! |
Southern Decadence Cupcakes
2 cups sugar
1 3/4 cups flour
3/4 cup unsweetened cocoa
1 1/2 tsp baking powder
1 1/2 tsp baking soda
1 tsp salt
1 1/2 cups water
2 eggs
1/2 cup vegetable oil
2 tsp vanilla extract
Preheat your oven to 350F. Prep two muffin tins by filling the cups with cupcake papers and spraying the surface lightly so that any spills or "muffin tops" won't stick. Whisk together the dry ingredients in a medium bowl. Add the eggs, oil, water and vanilla and mix until just combined. Fill your cupcake papers 2/3 of the way and bake the cupcakes for 10-15 minutes or until the tops bounce back up when pushed lightly.
Allow to cool completely and then frost.
Brown Sugar Buttercream
1 cup softened, unsalted butter
1 1/2 cups powdered sugar
1 cup packed light brown sugar
1 tsp salt
1 tsp vanilla extract
In a medium bowl, use a hand mixer to whip the butter until light and fluffy. Add the powdered sugar in increments. It will start to look clumpy, like cottage cheese. At this point, add the brown sugar. Be sure to break up any clumps so that your frosting will be smooth. Add the salt and vanilla while you can still see dry patches of brown sugar in the mix. Whip until light and creamy. I used a spatula to frost the cupcakes, to give them a homey look, but it could also be piped onto your cooled cupcakes.
Sunday, April 29, 2012
Chocolate Orange Crisps
I made these cookies for a jazz concert reception tomorrow. I have experimented with using orange, cinnamon and chocolate together before and had great results (check out this recipe). I hope you enjoy these crisp, flavorful treats.


Chocolate Orange Crisps
1 cup softened, unsalted butter
1/2 cup sugar
1 Tbs roughly grated orange peel (a cheese grater would work better than a fine grater for this)
1/2 tsp salt
1 tsp ground cinnamon
1 1/3 cups flour
1/3 cup cocoa powder
for the glaze:
the juice of one orange
powdered sugar
Preheat oven to 350F. Combine the butter and sugar with the zest in a mixing bowl until creamed. Add the dry ingredients and mix thoroughly, until all ingredients are incorporated.
Roll the dough into ping-pong sized balls and press them onto a prepared pan with at least 3/4" of space inbetween each one. They will spread slightly. Bake for 10-15 minutes or until crispy. Let cool on a drying rack and then glaze.
To prepare the glaze, fill a measuring cup most of the way with powdered sugar. Squeeze the orange into the powdered sugar. stirring until you have reached the desired consistency. A ratio with more powdered sugar will be thicker and will look more opaque on the cookie. A thin glaze will just leave the cookie looking glossy. Once the glaze looks right, I like to set my drying rack over a cookie sheet with parchment on it (the one I just baked with usually) and pour the glaze over the cookies. That way, the glaze will drip onto the parchment, which makes cleanup much more manageable.
Allow the glaze to set and enjoy.


Chocolate Orange Crisps
1 cup softened, unsalted butter
1/2 cup sugar
1 Tbs roughly grated orange peel (a cheese grater would work better than a fine grater for this)
1/2 tsp salt
1 tsp ground cinnamon
1 1/3 cups flour
1/3 cup cocoa powder
for the glaze:
the juice of one orange
powdered sugar
Preheat oven to 350F. Combine the butter and sugar with the zest in a mixing bowl until creamed. Add the dry ingredients and mix thoroughly, until all ingredients are incorporated.
Roll the dough into ping-pong sized balls and press them onto a prepared pan with at least 3/4" of space inbetween each one. They will spread slightly. Bake for 10-15 minutes or until crispy. Let cool on a drying rack and then glaze.
To prepare the glaze, fill a measuring cup most of the way with powdered sugar. Squeeze the orange into the powdered sugar. stirring until you have reached the desired consistency. A ratio with more powdered sugar will be thicker and will look more opaque on the cookie. A thin glaze will just leave the cookie looking glossy. Once the glaze looks right, I like to set my drying rack over a cookie sheet with parchment on it (the one I just baked with usually) and pour the glaze over the cookies. That way, the glaze will drip onto the parchment, which makes cleanup much more manageable.
Allow the glaze to set and enjoy.
Sunday, April 1, 2012
A day in San Francisco and a magical Chocolate Factory tour!
This post has been moved to tiramipursuit's new site.
Monday, February 27, 2012
Friday, January 20, 2012
Spending the day with my bros
I spent some time with Amani and Jordan before I left for school. They are not watching tv or playing video games at the moment, so I was drawing a blank about what to do once we exhausted the board game option. Then of course, a cookie popped into my brain and we set about to make our own recipe! Then we had a delicious snack of soba noodles drizzled with sesame oil, soy sauce and freshly grated meyer lemon zest.
THE CHOCOLATE COOKIE EXPERIMENT

Chocolate Almond Softies
Here's our experimental recipe! If you'd like to test it too and post your results here, I'm sure the little scientists would love to hear how it goes (:
1/2 cup unsalted butter, softened but not melted
1/2 cup sugar
1/4 cup brown sugar
1/2 tsp vanilla
1 egg
1 tbs cocoa powder
1/3 cup almond flour
1 cup flour
1 1/2 tbs baking soda
1 tbs mini chocolate chips
Preheat your oven to 350F and prep two half sheet pans with spray and parchment. Cream the butter, sugar and vanilla together. Add the egg and combine. Add the dry ingredients, then stir until it is a thick paste (you may want to sift the ingredients for a smoother cookie, we didn't mind the lumps). Fold in your chocolate chips. You can either chill the cookies for 15 minutes or go ahead and spoon tablespoons of the batter evenly spaced on your pan. We didn't notice much difference with the chilling, but I know this is a standard part of most recipes that use sticky dough. They do spread a bit, so be sure to give them some room to grow.
Bake for 15 minutes, or until crispy on the edges. Rotate pans once halfway through the baketime for even baking.
Enjoy!
THE CHOCOLATE COOKIE EXPERIMENT
 |
| The cookie scientists, enjoying their final product |
 |
| These chocolatey cookies are crisp on the outside, but soft and chewy inside. Delicious! |
 |
| Soba |
 |
| Amani didn't want to be left out of the picture but also has a hard time standing still! |
 |
| Cutie slurping noodles. Jordy is in a daze back there. |

 |
| Drizzle cooked buckwheat soba with sesame oil, soy sauce and toss with lemon zest. |
Chocolate Almond Softies
Here's our experimental recipe! If you'd like to test it too and post your results here, I'm sure the little scientists would love to hear how it goes (:
1/2 cup unsalted butter, softened but not melted
1/2 cup sugar
1/4 cup brown sugar
1/2 tsp vanilla
1 egg
1 tbs cocoa powder
1/3 cup almond flour
1 cup flour
1 1/2 tbs baking soda
1 tbs mini chocolate chips
Preheat your oven to 350F and prep two half sheet pans with spray and parchment. Cream the butter, sugar and vanilla together. Add the egg and combine. Add the dry ingredients, then stir until it is a thick paste (you may want to sift the ingredients for a smoother cookie, we didn't mind the lumps). Fold in your chocolate chips. You can either chill the cookies for 15 minutes or go ahead and spoon tablespoons of the batter evenly spaced on your pan. We didn't notice much difference with the chilling, but I know this is a standard part of most recipes that use sticky dough. They do spread a bit, so be sure to give them some room to grow.
Bake for 15 minutes, or until crispy on the edges. Rotate pans once halfway through the baketime for even baking.
Enjoy!
Crêpe party!
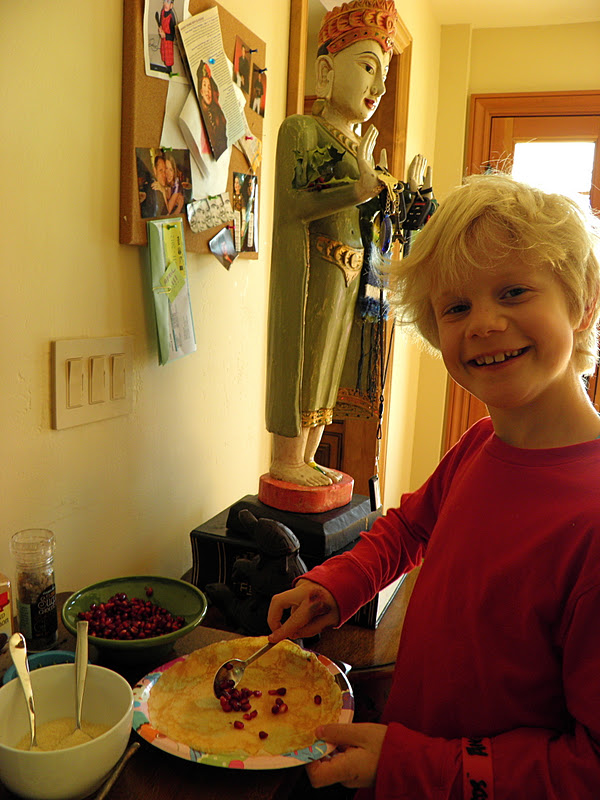
I am now away at school and having a great time! Before I left, my mom and I put together my going away party and she had the great idea to make a stack of crêpes and a sweet and savory station so that people could construct their lunch and dessert! It was so much fun. I made (I think it was) 8 times this recipe.
My mom made a Greek salad, chicken, sauteed mushrooms, asparagus and a variety of cheeses and sauces for the savory station. Then we set out nutella, melted chocolate, chopped mint, berries, marmalade, jam, mini chocolate chips, freshly whipped cream, powdered sugar, sugar, lemon and butter for the sweet station. It was a great party and so simple to put together, just be ready for a long time at the stove pouring and flipping crêpes! Make these for your sweetheart on Valentine's day or for your next party! <3

For Molly Katzen's amazing crepe recipe to host your own crepe party check out this post!
My mom made a Greek salad, chicken, sauteed mushrooms, asparagus and a variety of cheeses and sauces for the savory station. Then we set out nutella, melted chocolate, chopped mint, berries, marmalade, jam, mini chocolate chips, freshly whipped cream, powdered sugar, sugar, lemon and butter for the sweet station. It was a great party and so simple to put together, just be ready for a long time at the stove pouring and flipping crêpes! Make these for your sweetheart on Valentine's day or for your next party! <3
 | |
|
 |
| The sweet station |
 |
| Amani |
 |
| Avonlea |
 |
| Jordan (: |
 |
| Olivia |

 |
| I try not to post too many repetitive pictures, but this crepe was just so photogenic! |
Friday, January 6, 2012
Crêpes
I fell in love with Molly Katzen's Moosewood Cookbook. I literally read it cover to cover, it was so inspiring and all of the recipes sound very healthy and most have options for lowering fat content.
Among these wonderful recipes was a very simple recipe for crêpes, which was exciting for me because I have always been a little intimidated by the idea of making crêpes but I've always wanted to make them. I tried a few years ago but found it difficult to keep them from sticking to the pan.
This recipe is literally a whiz as it's made in the blender in about 2 seconds. I tried using my new KitchenAid, but the blades of my food processor got rid of the lumps like magic, transforming it into silky smooth batter instantly.

I made Molly Katzen's recipe for my family for breakfast this week and set up a little station of melted chocolate, whipped cream, cinnamon sugar, butter and this great lingonberry sauce that my godmother Suyin and my friend Melody gave me as part of my birthday basket of goodies. The tart berry sauce was divine with the chocolate, even competing with my favorite toppings which are butter, lemon juice and sugar(=the best).


Moosewood Crêpes (find Katzen's book in my books section.)
1 egg
1 cup flour
1 1/4 cup milk (use low-fat or rice milk as a healthier alternative)
1/4 tsp salt
Pour into a food processor or blender and blend until smooth. Heat a nonstick pan on the stove until a drop of water sizzles instantly. Brush very lightly with oil over every surface of the pan. Pour about 1/4 cup of batter and swirl around to coat pan (the amount may vary, I made larger crêpes so I ended up using about 3/8 cup of batter for each). Pour any excess back into the bowl of batter. Let heat about 20 seconds, until cooked and even lightly browned if you like then flip and let the other side cook for a few seconds. Stack on a plate (they won't stick together). Serve with any variety of sweet and savory toppings!
It's so simple isn't it? What a genius recipe, I am officially in love with this book.
Bon appetit!
Among these wonderful recipes was a very simple recipe for crêpes, which was exciting for me because I have always been a little intimidated by the idea of making crêpes but I've always wanted to make them. I tried a few years ago but found it difficult to keep them from sticking to the pan.
This recipe is literally a whiz as it's made in the blender in about 2 seconds. I tried using my new KitchenAid, but the blades of my food processor got rid of the lumps like magic, transforming it into silky smooth batter instantly.
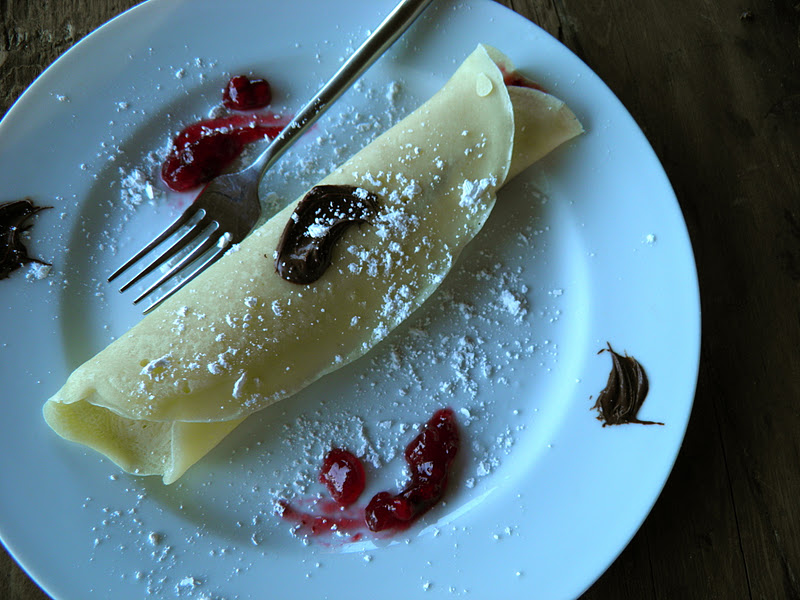
I made Molly Katzen's recipe for my family for breakfast this week and set up a little station of melted chocolate, whipped cream, cinnamon sugar, butter and this great lingonberry sauce that my godmother Suyin and my friend Melody gave me as part of my birthday basket of goodies. The tart berry sauce was divine with the chocolate, even competing with my favorite toppings which are butter, lemon juice and sugar(=the best).

 |
| Jordan helping himself at the crêpe station. |
 |
| Chocolate and lingonberry sauce. |


 |
| My boyfriend Max gave me this awesome crêpe pan for Christmas and it worked perfectly when I made this recipe! |
1 egg
1 cup flour
1 1/4 cup milk (use low-fat or rice milk as a healthier alternative)
1/4 tsp salt
Pour into a food processor or blender and blend until smooth. Heat a nonstick pan on the stove until a drop of water sizzles instantly. Brush very lightly with oil over every surface of the pan. Pour about 1/4 cup of batter and swirl around to coat pan (the amount may vary, I made larger crêpes so I ended up using about 3/8 cup of batter for each). Pour any excess back into the bowl of batter. Let heat about 20 seconds, until cooked and even lightly browned if you like then flip and let the other side cook for a few seconds. Stack on a plate (they won't stick together). Serve with any variety of sweet and savory toppings!
It's so simple isn't it? What a genius recipe, I am officially in love with this book.
Bon appetit!
Tuesday, November 22, 2011
Chocolate Peppermint Whoopie Pies
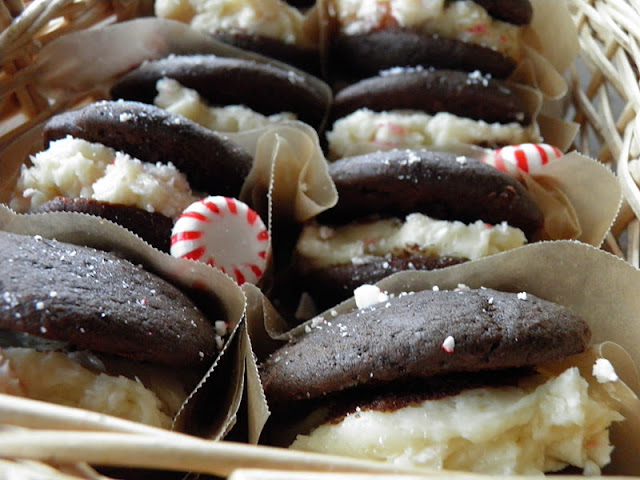
Today is my dad's birthday in addition to my sister's. Last year, I asked him what his favorite dessert was and he told me when he was a kid, he had these whoopie pies with crushed peppermint candies in them and that those were his favorite. I tried making them and experimented with different mints. I tried those soft, butter mints because I thought regular mints would be to crunchy, but he didn't like them as much. He said they're best with the crunchy kind. I also learned that when these mints sit on liquid, for example mixed with marshmallow whoopie pie filling, they tend to "melt" and become sticky. So, if you plan to add peppermints, which I highly recommend, don't stir them into the filling or roll the pies in them until right before serving them.



My mom and sister got me the cutest whoopie pie book last Christmas by Sarah Billingsley and Amy Treadwell called "Whoopie Pies: Dozens of Mix'em, Match'em, Eat'em Up Recipes". They have both sweet and savory recipes for the cakes and fillings that make it easy to mix and match flavors, not to mention great tips to have them come out perfectly every time. I'll add this fun little book to my books list for your convenience.
If you are a vegetarian, you are probably thinking "Marshmallows? Wait a second..." If you're not, you should know that marshmallows usually have gelatin in them and are therefore not vegetarian. However, much to my delight, marshmallow fluff does not contain gelatin, so you can enjoy these little sandwich cakes to you're heart's content.
Classic Whoopie Pies
Cakes:
1 2/3 cups all-purpose flour
2/3 cup unsweetened cocoa powder
1 1/2 tsp baking soda
1/2 tsp salt
4 tbs unsalted butter at room temperature
4 tbs vegetable shortening
1 cup packed dark brown sugar
1 large egg
1 tsp vanilla extract
1 cup milk
Position a rack in the center of the oven and preheat it to 375F. Line two baking sheets with parchment paper.
Sift together the flour, cocoa powder,baking soda and salt. In a bowl (either with a mixer with the paddle attachment or with a hand-held mixer), beat together the butter, shortening and brown sugar on low speed until just combined. Increase the speed to medium and beat until fluffy and smooth, about 3 minutes. Add the egg and vanilla and beat for another 2 minutes.
Add half the flour and half the milk to the batter and beat on low until just incorporated. Scrape down the sides of the bowl. Add the remaining flour and milk and beat until completely combined.
Using a spoon, drop about 1 tablespoon of batter onto one of the prepared baking sheets and repeat, spacing them at least 2 inches apart (they really do spread and puff up). Bake one sheet at a time for ten minutes each, or until the pies spring back when pressed gently. Remove from oven and let the cakes cool on the sheet for about 5 minutes before transferring them to a rack to cool completely.
Makes about 48, 2" cakes.
Filling:
1 1/2 cups Marshmallow Fluff
1 1/4 cups vegetable shortening
1 cup confectioner's (powdered) sugar
1 tbs vanilla extract
In the work bowl of a stand mixer with the paddle attachment, or in a large bowl with a hand-held mixer, beat together the marshmallow fluff and the vegetable shortening, starting on low and increasing to medium speed until the mixture is smooth and fluffy, about 3 minutes. Reduce mixer speed to low, add the confectioner's sugar and the vanilla, and beat until incorporated. Increase mixer speed to medium and beat until fluffy, about three minutes more.
To assemble: You can pipe the filling between the cakes if you want or spoon it on. This is the stage where I add the crushed peppermint candies. I also like to break a few mints more finely and roll the edges of the whoopie pies in it when they are filled. This makes them very sparkly and glamorous (:
Happy birthday, Dad! <3

 |
| I love the contrast of the bright whites and red, I thought it was really stunning. |


My mom and sister got me the cutest whoopie pie book last Christmas by Sarah Billingsley and Amy Treadwell called "Whoopie Pies: Dozens of Mix'em, Match'em, Eat'em Up Recipes". They have both sweet and savory recipes for the cakes and fillings that make it easy to mix and match flavors, not to mention great tips to have them come out perfectly every time. I'll add this fun little book to my books list for your convenience.
If you are a vegetarian, you are probably thinking "Marshmallows? Wait a second..." If you're not, you should know that marshmallows usually have gelatin in them and are therefore not vegetarian. However, much to my delight, marshmallow fluff does not contain gelatin, so you can enjoy these little sandwich cakes to you're heart's content.
Classic Whoopie Pies
Cakes:
1 2/3 cups all-purpose flour
2/3 cup unsweetened cocoa powder
1 1/2 tsp baking soda
1/2 tsp salt
4 tbs unsalted butter at room temperature
4 tbs vegetable shortening
1 cup packed dark brown sugar
1 large egg
1 tsp vanilla extract
1 cup milk
Position a rack in the center of the oven and preheat it to 375F. Line two baking sheets with parchment paper.
Sift together the flour, cocoa powder,baking soda and salt. In a bowl (either with a mixer with the paddle attachment or with a hand-held mixer), beat together the butter, shortening and brown sugar on low speed until just combined. Increase the speed to medium and beat until fluffy and smooth, about 3 minutes. Add the egg and vanilla and beat for another 2 minutes.
Add half the flour and half the milk to the batter and beat on low until just incorporated. Scrape down the sides of the bowl. Add the remaining flour and milk and beat until completely combined.
Using a spoon, drop about 1 tablespoon of batter onto one of the prepared baking sheets and repeat, spacing them at least 2 inches apart (they really do spread and puff up). Bake one sheet at a time for ten minutes each, or until the pies spring back when pressed gently. Remove from oven and let the cakes cool on the sheet for about 5 minutes before transferring them to a rack to cool completely.
Makes about 48, 2" cakes.
Filling:
1 1/2 cups Marshmallow Fluff
1 1/4 cups vegetable shortening
1 cup confectioner's (powdered) sugar
1 tbs vanilla extract
In the work bowl of a stand mixer with the paddle attachment, or in a large bowl with a hand-held mixer, beat together the marshmallow fluff and the vegetable shortening, starting on low and increasing to medium speed until the mixture is smooth and fluffy, about 3 minutes. Reduce mixer speed to low, add the confectioner's sugar and the vanilla, and beat until incorporated. Increase mixer speed to medium and beat until fluffy, about three minutes more.
To assemble: You can pipe the filling between the cakes if you want or spoon it on. This is the stage where I add the crushed peppermint candies. I also like to break a few mints more finely and roll the edges of the whoopie pies in it when they are filled. This makes them very sparkly and glamorous (:
Happy birthday, Dad! <3
Monday, November 14, 2011
Tuesday, September 13, 2011
Very Belated Harry Potter Treats
The night of the Midnight Harry Potter release this year, I made a variety of sweets treats to celebrate the occasion: white chocolate peppermint toads with green pepermint buttercream filling, pumpkin pasties and gingerbread newt cookies. The newts were sort of a flop because I ran out of time, although I had success with them many years ago when I spenmt hours shaping them and brought them to a slumber party with my friends ( :
Here are some pictures, with my sister Avonlea!


Here are some pictures, with my sister Avonlea!


Wednesday, July 6, 2011
June: a month of cakes and chocolate!
This month I was enrolled in a cake decorating class and also a chocolate class. I am also currently taking a vegetarian cooking class. I haven't done much cooking since I got a job as an intern at a bakery, until this week when I realized I'd stopped! So, I also made dinner on the 4th and have been working on creating one of my favorite lunches: Ochazuke with Hojicha green tea broth.

 |
| Cool spices mixed up for ginger cookies at work. |
 |
| Freshly picked, local blueberries! |
 |
| Practicing piping with butter :P |
 |
| Red velvet in cake class! I learned at work that red velvet used to be just cocoa powder and the vinegar turned it slightly red. |
 |
| Nowadays, most people use a lot of food coloring and expect a bright red from a red velvet cake. This recipe used vinegar and cocoa, but also some food coloring. |
 |
| Chocolate feast! |
 |
| Walnut fudge that I made in class. |
 |
| Using my new piping skills at work! I know the flowers look sketchy, but it's actually a copy of the party plates we were given. They're supposed to look fake and kind of whimsical. |
 |
| Cupcakes to match the cake. The girl was turning two and for her birthday, they were having a "ladybug release" party! SO cute! :D |
 |
| The culmination of my cake decorating class. Vanilla Swiss meringue buttercream on an almond-infused yellow cake, with fresh strawberry filling and marzipan strawberries. My boyfriend and little bro helped me punch out the gum paste blossoms the night before so they could dry overnight. I filled the centers with yellow royal icing the next day in class. |
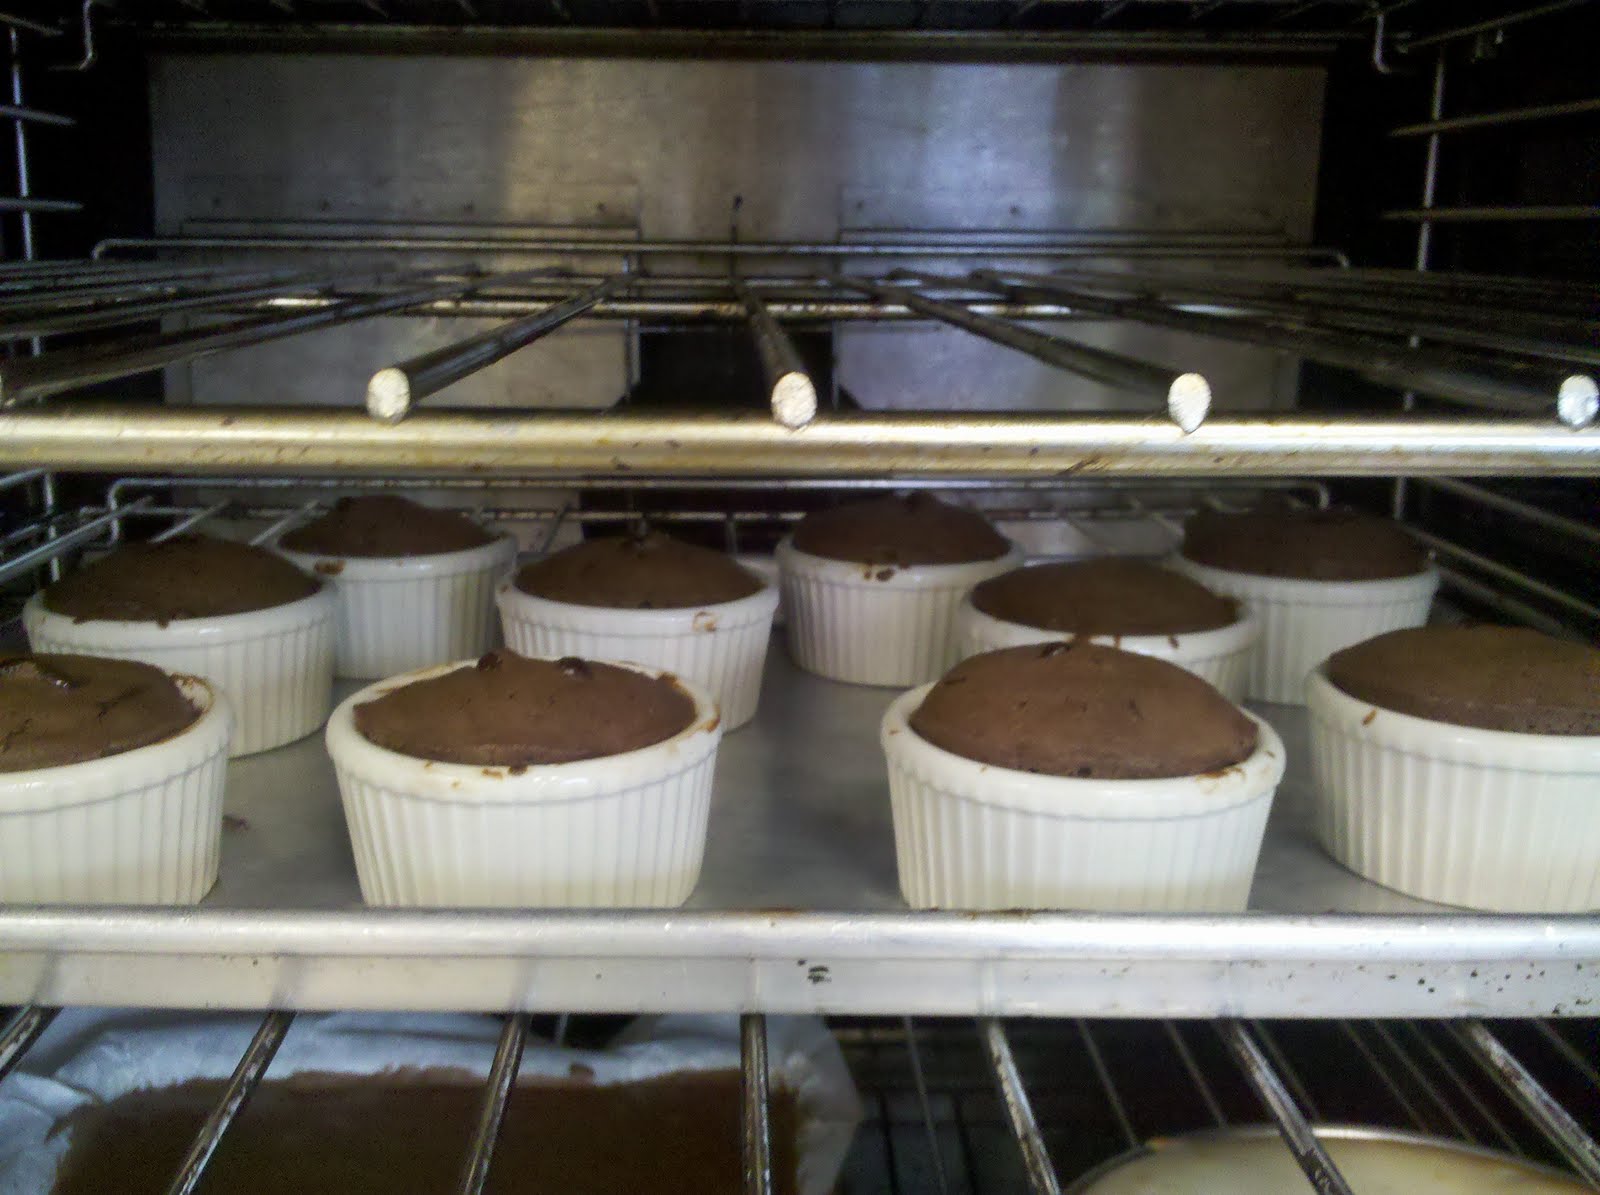 |
| Was lucky enough to draw "molten cakes" out of the hat at chocolate class! One of my favorite desserts (: |

 |
| MMM Lava-ey |
 |
| Got to draw this pug on a cake for the cake decorator to pipe at work! |
 |
| Lychee at WHOLE FOODS. |
 |
| Lunch: Pepper jack pupusas with fresh salsa and cabbage salad. |
 |
| My newest experiment: Ochazuke a la Infusions in sebtown. They charge way too much for me to go there every day like I'd like to! They basically take quinoa, dried seaweed, veggies, tofu and green onions, mild miso and plum paste then pour this Hojicha (amaaaazing) green tea over it. Bon appetit! |
Subscribe to:
Posts (Atom)